
Easily upload files using your browser with PhotoShelter’s Web Uploader. It’s super quick, simple, and ensures everyone on your team has what they need in seconds.
Standing out visually is the key to grabbing your audience’s attention. But the quality of your visuals are only as good as your team’s workflow. After all, you need to be able to find photos and videos before you can use them.
Storing your team’s files in a centralized location is essential to being able to share them far and wide. That’s why investing in digital asset management is crucial—it keeps your brand’s content organized and makes it easily discoverable. Before you think about adding metadata to make your files searchable or setting permissions on a Gallery or Collection, it’s imperative that you know how to quickly and easily upload your files into your PhotoShelter DAM Library.
PhotoShelter was built with six unique upload options—and they all have their merits—but oftentimes, simplicity is the way to go.
That’s where the Web Uploader comes in.
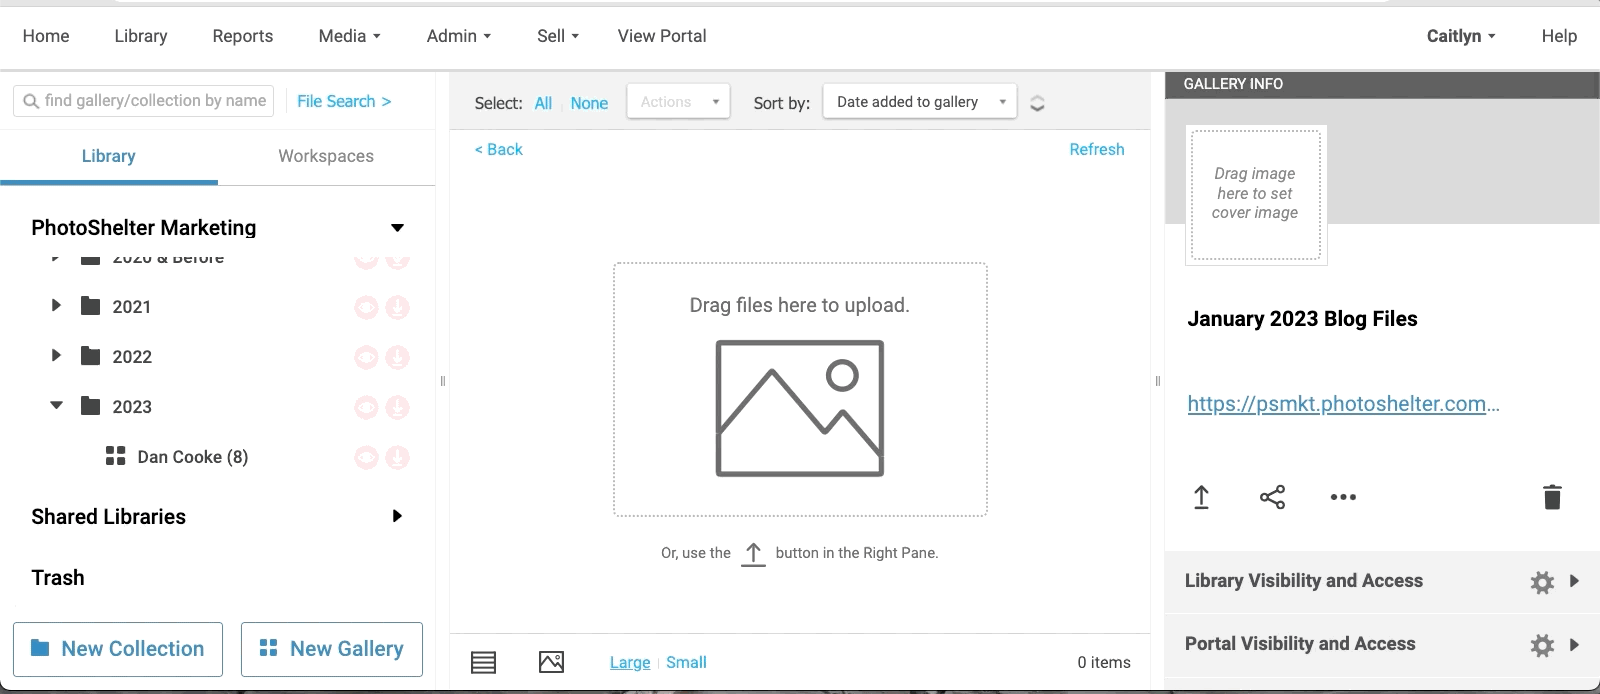
The simplest way to upload all file types into PhotoShelter for Brands is through your web browser. Administrators and Editors can easily drag and drop any file type into the center pane of an open Gallery in the Library. This is an ideal method when you’re working with a handful of files or adding additional files to an existing body of work or Gallery.
The Web Uploader is right for you if…
- You’re looking for the simplest upload method (drag and drop)
- You need to see the image or file previews immediately
- You’re worried about duplicate files being uploaded
- You have a mixture of file types to upload
- You need to add a few files to a Gallery that already exists in your Library
- You want to be thorough and careful about your upload (versus something like Incoming FTP, which would get all files uploaded in one fell swoop without the same degree of supervision, as you won’t be able to watch the upload happen in real-time.)
Consider another upload method if…
- You need to upload multiple folders or a full folder structure from a hard drive
- Your upload is large, which may be too time-consuming for your internet connection. The recommended maximum upload of images for the Web Uploader is 200 at a time, depending on the file sizes.
When I need to get a few files in my account for testing or someone on my team needs something quickly in our account, my reflex is to use the Web Uploader. It’s great to know that I’m a simple drag and drop away from getting the files I need in the place I want. Plus, it’s great that I’m already in my account when the upload is complete and can get to work on things right away. The convenience is unmatched.
Jelan Coley, Product Specialist at PhotoShelter
How to Use the Web Uploader
Whether you’re uploading files into a new Gallery or simply adding to one that’s already in your Library, the Web Uploader is a great choice.
Here’s how you do it in six steps:
- Log in to your PhotoShelter for Brands account at https://brands.photoshelter.com.
- From the Media menu, select Library.
- In the left pane, create a new Gallery or select an existing one from your Library’s folder structure. (Learn more about creating Galleries and Collections here.)
- After you name your Gallery, click the Upload button in the right pane or drag and drop files from your desktop into the marked rectangle.

Heads up! The Web Uploader cannot upload a selected file folder’s content as it’s designed for individual files.
- If you prefer to not drag and drop, you can also click Select Files in the pop-up window to locate the files you want to upload on your desktop.
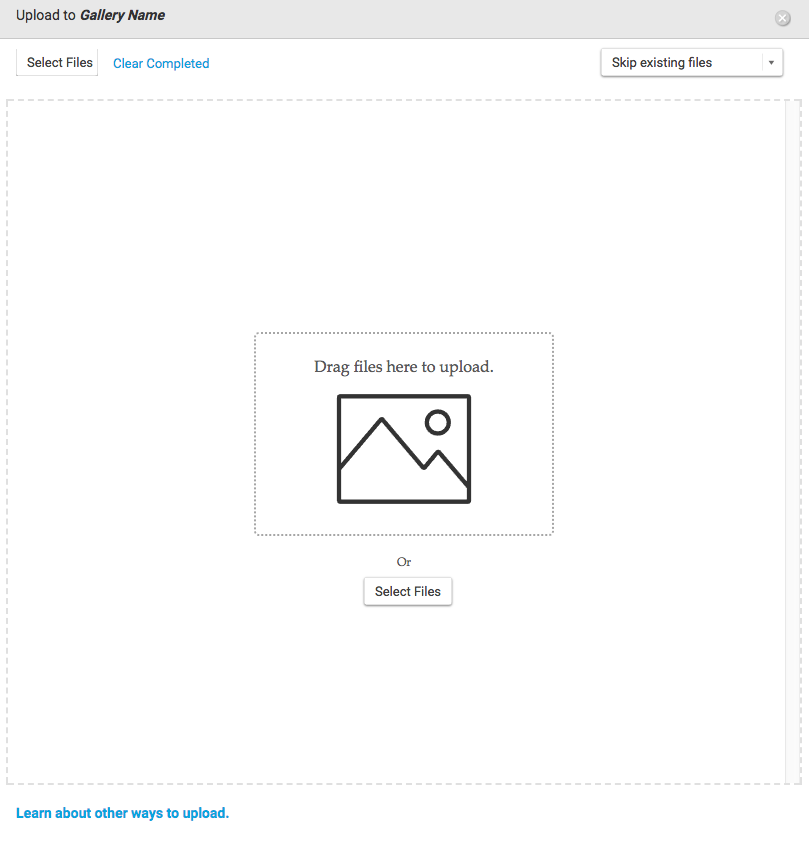
- As files are uploaded, you’ll see a thumbnail preview appear. If you need to continue to work in PhotoShelter while your upload is processing in the active tab, you may need to open a second tab and work around the gallery into which you’re actively uploading. Upload times will vary based on your Internet connection speed, the size of the files you’re uploading, and your computer’s operating system.
Pro Tip: The menu in the top right corner of the uploader has options for how to handle duplicate files.
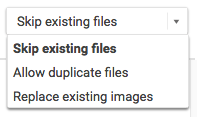
When the uploader discovers that a new file you’re uploading has a filename identical to a file that already exists in the Gallery (such as baseball-game.jpg), you can:
- “Skip existing files”: the new file will be skipped, and will not be uploaded. The existing file will continue to live in the gallery.
- “Allow duplicate files”: the new file will be uploaded, so you will now have files with the same filename within the gallery.
- “Replace existing images”: this works for images only.
- The new image will replace the existing image. You will lose any existing metadata and custom metadata applied to the existing image. However, the PhotoShelter for Brands File ID (found under Basic Info in the right pane) will remain the same.
- Non-image files such as video, audio, and other files will upload regardless of whether or not files of the same exact name already exist in the gallery, so you may end up with some duplicate files.
A quick note about large uploads from Client Success Manager Jalal Zahr…
I love the convenience and speed of the Web Uploader but it’s worth mentioning that it’s not the right fit for every type of upload.
If a user has a lot of content—whether it’s a large number of files or large file sizes—and are adding files via the Web Uploader, uploads can take awhile and that may slow down your workflow slightly if you want to do a lot of other things in the Library at the same time. Many factors impact upload times and they can vary based on your internet speed, the total size of the files being upload, and your computer itself.
Just remember we have six different upload methods to accommodate different workflows. In this example, Incoming FTP might become a better option. That way this person can upload a large amount of content and continue to work within the Library while the upload runs.
Uploads are just the start

Just remember: uploading and getting files organized in your Library is the first step in ensuring efficient workflows for your team. It’s the foundation of a successful DAM.
After uploading, we recommend focusing your efforts on:
- reviewing automated tags or adding metadata to increase file searchability
- sharing files via Quick Send or by setting permissions at the Gallery or Collection level using User Groups
- creating a Workspace for team-wide collaboration
To learn more about how to use PhotoShelter to your team’s advantage, sign up for our customer newsletter where you’ll receive platform updates and all the pro tips you’ll ever need!
If your organization hasn’t invested in digital asset management yet, start here to learn how we might help your team and organization save time and money by speeding up your brand’s marketing and communications operations.


